![How to Use an RV Toilet [RVezy Guide for Beginners]](https://ghost-cdn.rvezy.com/2023/03/An-RV-bathroom-with-gravity-fed-toilet.jpg)
If you're planning to take a road trip in an RV, one of the essential things you'll need to know is how to use the toilet. While it might seem like a simple task, RV toilets work a little differently than the ones you're used to at home.
To make sure you're prepared for your trip and to avoid any unpleasant mishaps while you're on the road, we've put together this guide on how to use an RV toilet.
Let’s get started.
Key Takeaways
- RV toilets work differently from residential toilets and typically use less water to conserve tank capacity
- Waste from the toilet flows into the black tank, while sinks and showers drain into the gray tank
- Most RV toilets use a foot pedal flush or manual lever to control water flow and flushing
- Using RV-safe toilet paper and approved RV toilet chemicals helps prevent clogs and control odor
- Proper water usage and regular dumping help maintain tank performance and avoid buildup issues
Types of RV Toilets
Gravity Flush Toilet
The most common type of RV toilet is the gravity flush toilet, which uses a combination of water and gravity to create pressure for flushing. Gravity flush toilets require a large holding tank for waste disposal and can add a significant amount of weight to your overall carrying capacity.
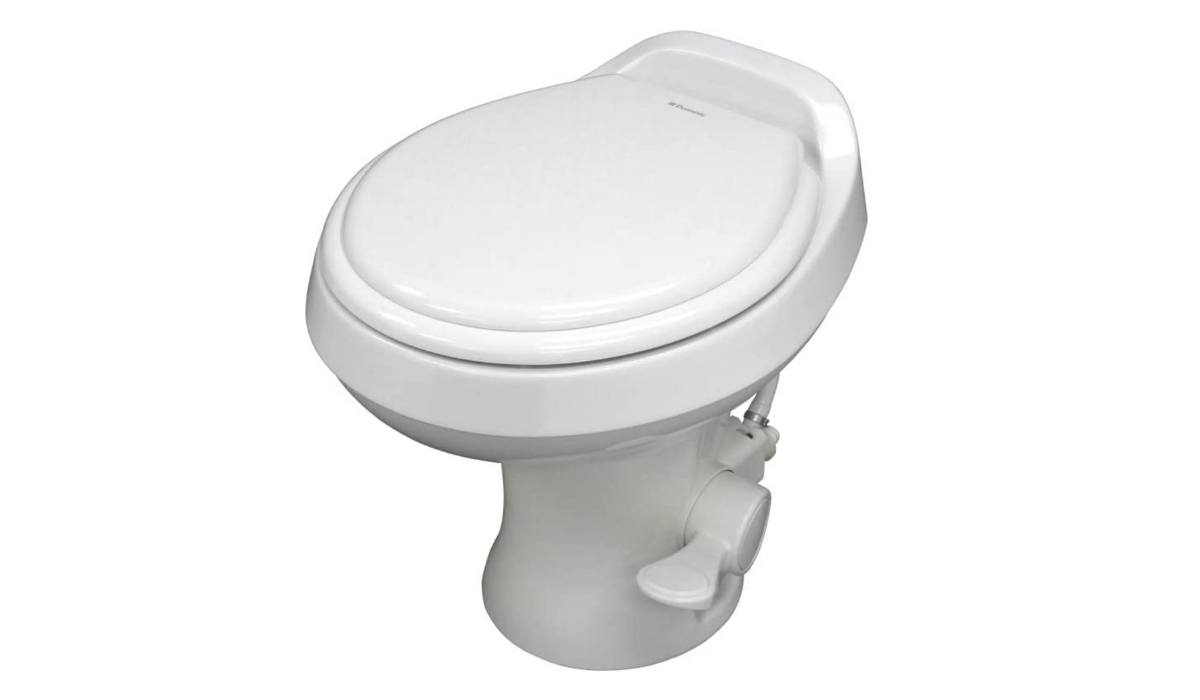
Typically found on Class A and Class C motorhomes, fifth wheels, and travel trailers.
Cassette Toilet
The cassette toilet uses a removable container that can be quickly removed from the RV and emptied when full. Cassette toilets are easy to install and use minimal water, but they require frequent emptying and can be expensive to purchase.
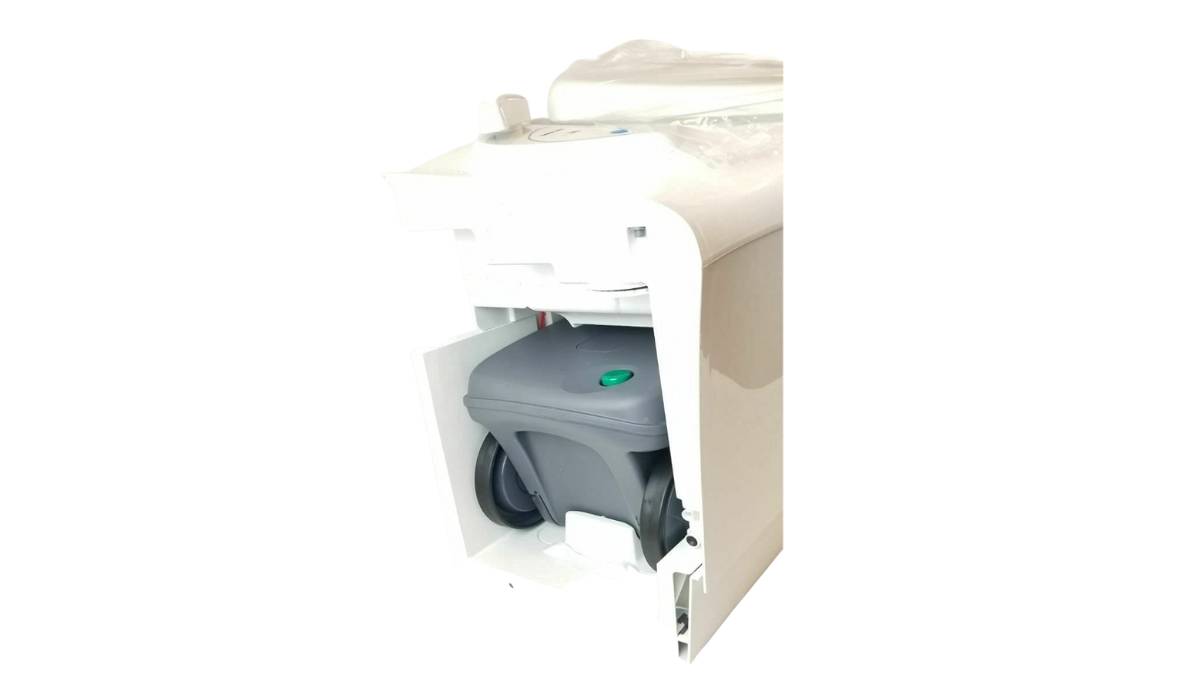
Typically found on smaller RVs such as Class B campervans, micro trailers, and tent trailers.
Composting Toilet
Composting toilets separate liquid and solid waste. Most use a composting medium, such as peat moss or coco coir, to help break down solid waste with microorganisms. Liquid waste usually needs to be emptied more frequently, while composted solids should be disposed of according to local regulations or at appropriate disposal sites. Composting toilets are relatively self-contained and require minimal maintenance, making them ideal for campers traveling to remote locations where access to water may be limited.
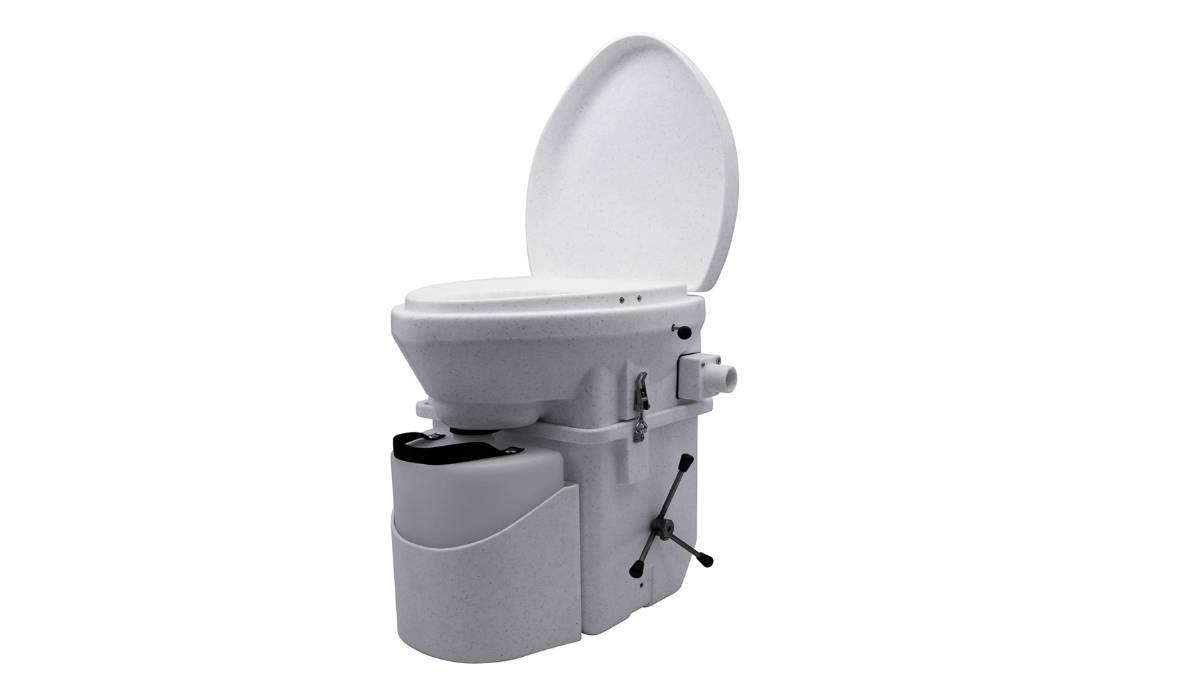
Typically found on truck campers, Class B campervans, and RVs meant to spend extensive time off the grid.
Other RV toilet types, such as macerating and incinerating toilets, also exist, but gravity flush, cassette, and composting toilets are the most common options RVers are likely to encounter.
What's the Difference Between an RV Toilet and a Residential Toilet?
Water Usage
RV toilets use less water than residential toilets, which helps conserve the freshwater supply and the holding tanks onboard your RV.
Pro Tip: Use enough water to fully cover the bottom of the bowl before flushing. This helps prevent waste from sticking and improves overall drainage into the black tank.
Size
RV toilets are made with lightweight materials, compact components, and smaller bowls than residential toilets, which means RV toilets can clog easily if you try to flush too much waste at once.
Flush
In most RVs, you have to manually fill and flush the toilet instead of simply flushing the toilet like you would at home.
But, don't let the word manual scare you; it's actually easy to use an RV toilet once you know how!
How to use a toilet in an RV
The steps to use a gravity flush RV toilet are as follows:
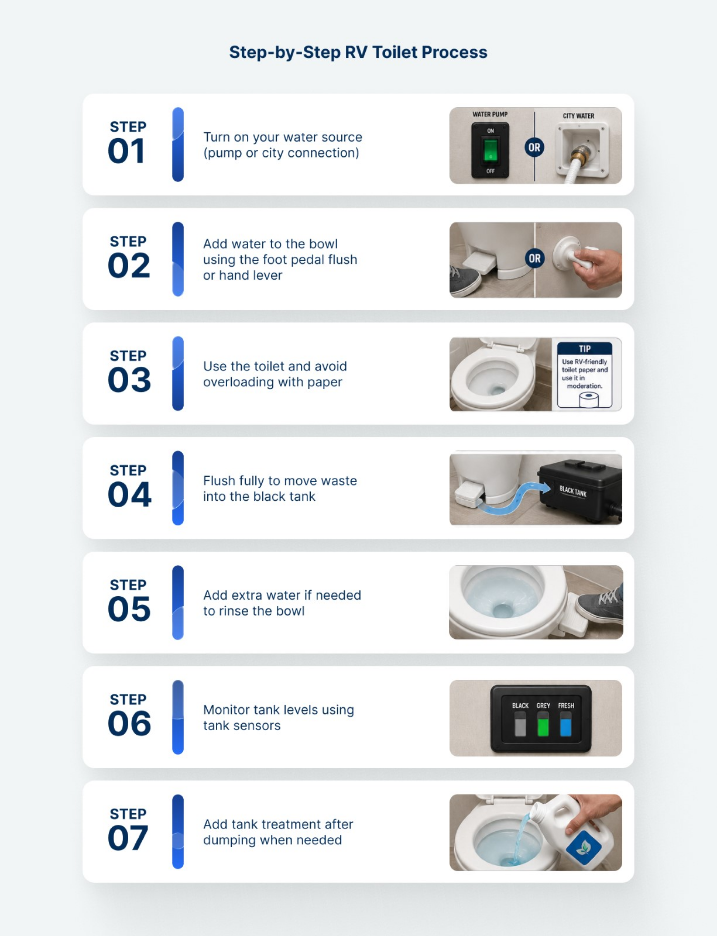
1. Locate the water valve - The water valve for your RV toilet is typically located near the toilet's base.
2. Turn on your water source - If you are using water from onboard your RV, turn on the water pump switch to draw the water from your freshwater holding tank. If you're hooked up to city water, simply turn on the faucet.
3. Add water to the bowl - Press down on the foot pedal halfway or pull up on the hand lever halfway to add water to the bowl. You need enough water to cover the seal.
Pro tip. It's important to note that using too much water can fill up your holding tank more quickly, so it's best to find a balance between using enough water for proper flushing and not overusing water unnecessarily.
4. Do your business - Refrain from adding too much toilet paper to the bowl. Repeat step three if you need to add more water to the bowl before you flush.
5. Flush - Once you've added enough water, press down fully on the foot pedal or push down on the lever to flush waste and paper into your holding tank.
6. Add more water - If you notice that waste is sticking to the sides of your bowl after flushing, add more water before flushing again.
Pro tip. Only flush human waste, RV toilet paper, and RV tank treatment down the toilet. Flushing sanitary products, disposable wipes, or anything not approved for an RV toilet will damage your RV's plumbing and black water holding tank.
Frequently Asked Questions
Do I have to use RV toilet paper?
RV manufacturers recommend RV or septic-safe toilet paper because it breaks down better than regular toilet paper. Plus, it's less likely to clog the tank or plumbing system.
How do I control odors?
RV tank treatments, like Happy Campers or Unique RV Digest-It, help to control odor by breaking down toilet paper, human waste, and the bacteria that cause unpleasant smells. Using a tank additive also helps to keep your tanks clean and free from buildup, which can improve the overall performance of your tank sensors.
How/when do I add RV tank treatments?
After emptying your black tank, fill your toilet with approximately 1 gallon (full bowl) of water, add the tank treatment, and immediately flush. For hot climates and tanks over 40 gallons, repeat the above and add two more gallons of water to the black tank.
What can I flush down an RV toilet?
Only flush human liquid and solid waste, water, RV toilet paper, and RV tank treatment.
How much water do I need to use in my RV toilet?
As a general rule of thumb, you'll want to use enough water to fully cover the bottom of the bowl and create a seal before flushing. This method helps to prevent waste from sticking to the sides of the bowl and ensures proper drainage.
What tank does the RV toilet empty into?
The RV toilet empties into the black water holding tank.
How do I know when to dump the black water holding tank?
Most RVs have sensors that monitor black, gray, and freshwater tank levels. A good rule is to dump the black tank when it reaches around two-thirds to three-quarters full. Dumping too early may not create enough flow to carry solids out of the tank, while waiting until it is completely full can increase overflow risk.
Pro Tip: Monitor your tank sensors regularly and avoid waiting until the tank is completely full. Dumping around two-thirds to three-quarters full helps create enough flow to move solids while avoiding an overfilled tank.
Can I flush the toilet if I'm not connected to water?
Yes. If your RV isn't connected to water, or you don't have fresh water in your holding tank, you can still flush the toilet by filling a jug or bucket with potable water and pouring it into the bowl before you flush. Make sure you add extra water down the toilet after flushing to put enough fluid in your black tank for your RV tank treatment to work correctly.
How do I empty my holding tanks?
Check out the article 9 Things You Need to Know About Your RV's Black Water Tank for step-by-step instructions for dumping your tanks.
How do I find an RV dump station?
RVezy's guide, How to Find an RV Dump Station Near You, details everything you need to know about locating a dump station.

Meagan Butler
Meagan is a glitter-loving, trailer-towing RV content writer. When she's not camping in her Winnebago Solis, she spoils her dogs, takes landscape photography, and supports the RV community.
View more posts