How to Use the RV Hookups in a Campground
Posted on December 15, 2022
In this guide, you’ll find everything you need to safely connect your RV to the available utilities (electricity, water, sewer, and cable) at any campsite.
What you’ll learn:
- What to do before connecting your hookups.
- How to connect your RV to electrical power.
- Different types of electrical outlets (15/20/30/50 amp).
- How to connect your RV to water.
- How to connect your RV to the sewer.
- How to connect your RV to cable.
Following the steps below will save you time and avoid injury and damage to your RV.
Before hooking up
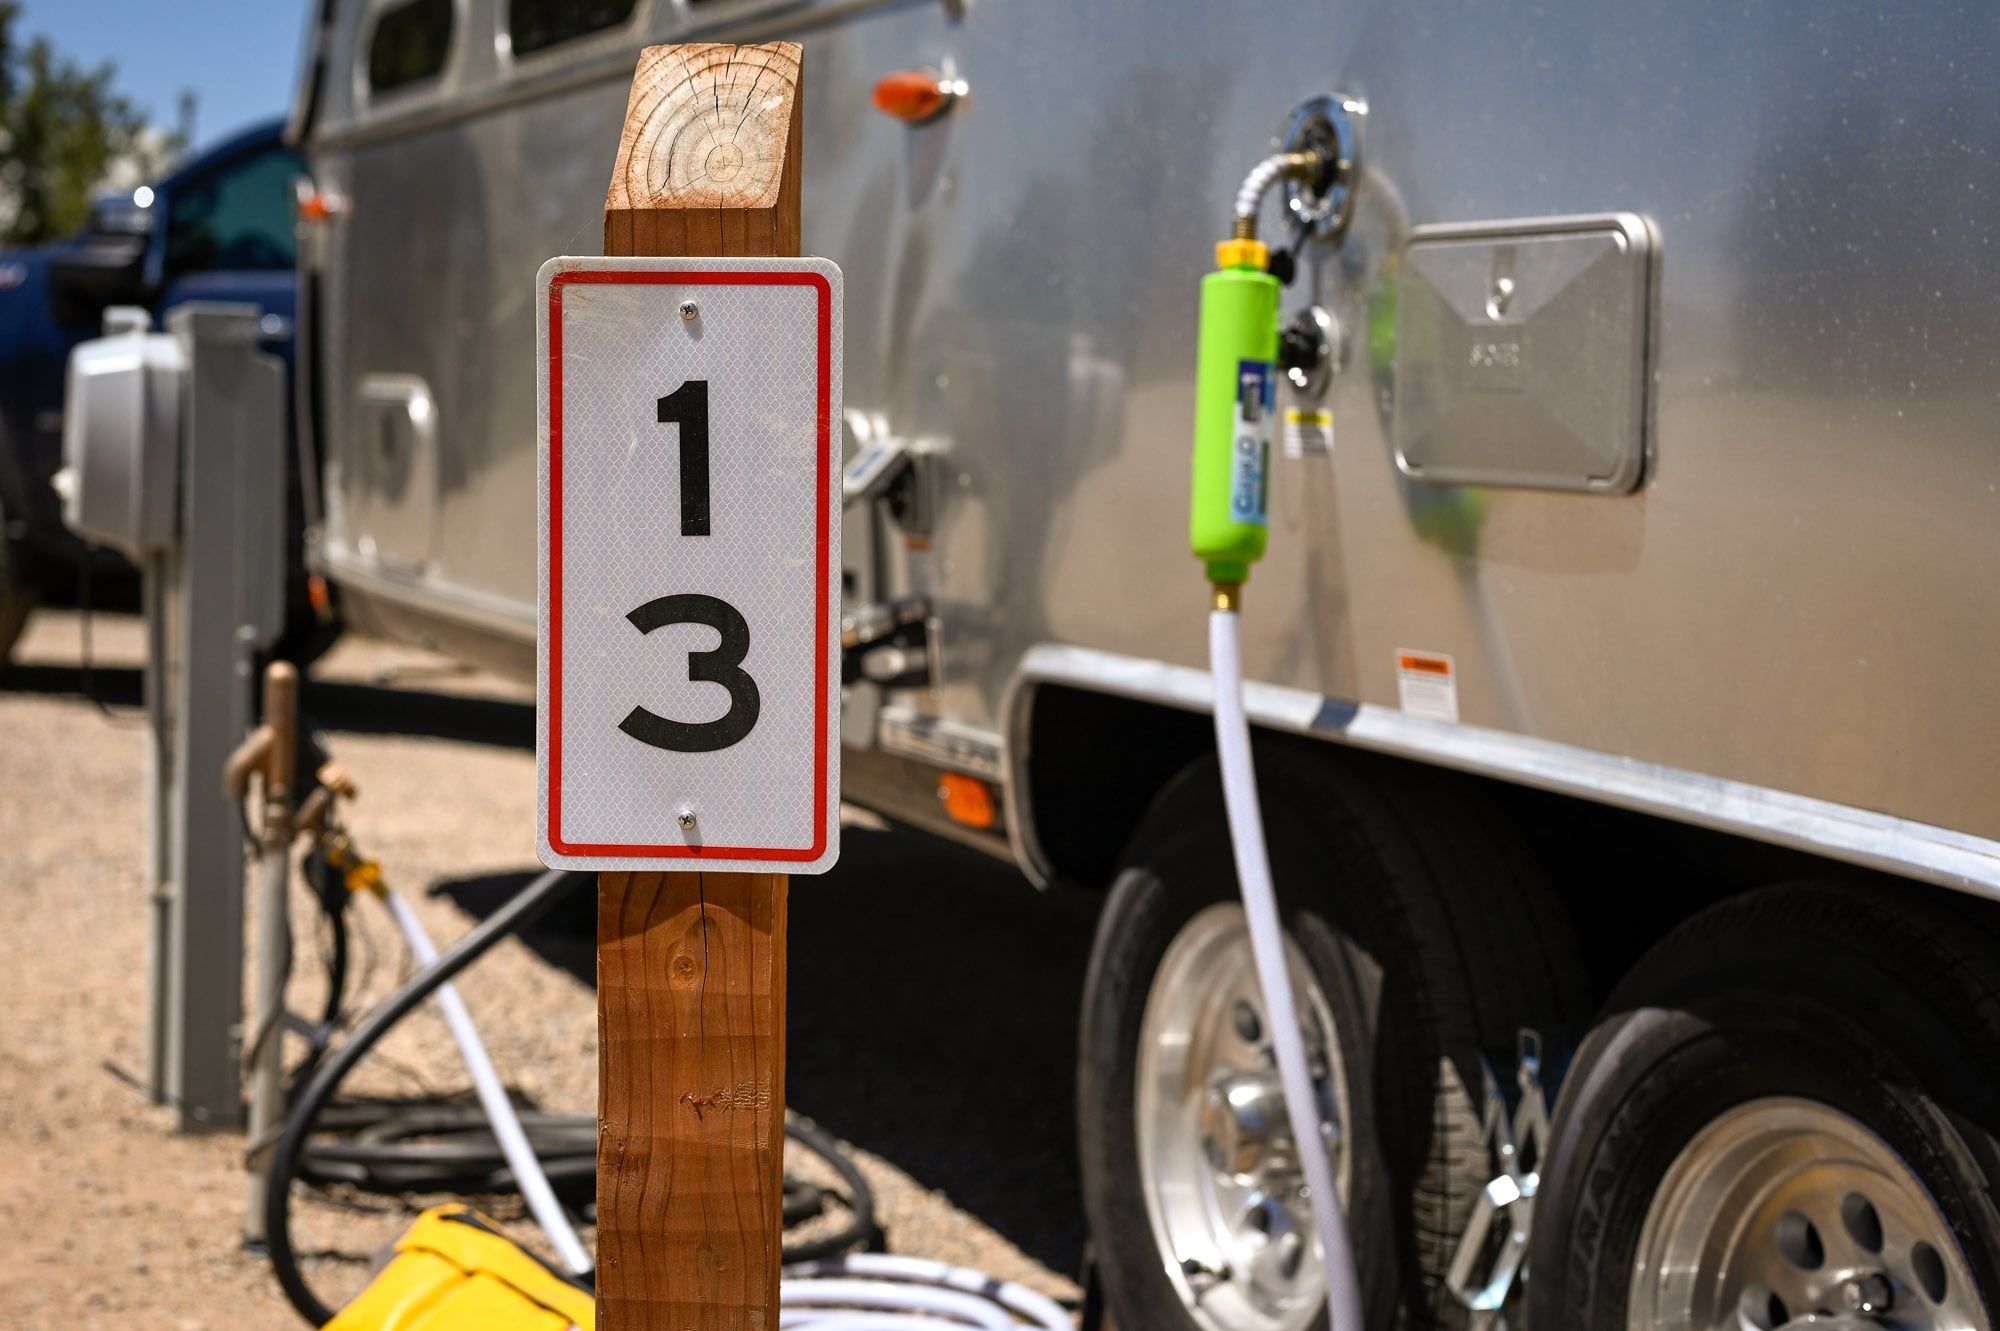
Most RV hookups are located on the driver's side of the RV near the rear to align with the electricity, water, and sewer connections at a campsite.
Before you park your RV and begin setting up camp, ensure you park your RV close to all of the utility hookups.
- Level your RV from side to side and front to back.
- Disconnect your RV from your tow vehicle before connecting to the utilities.
RVezy tip. Staying only one night? If you are towing, you can stay connected and plug in your utilities like normal. Just make sure you unplug your brake light connection until you're ready to leave the next day. Unplugging your 7-pin cord will prevent you from accidentally draining your tow vehicle's battery.
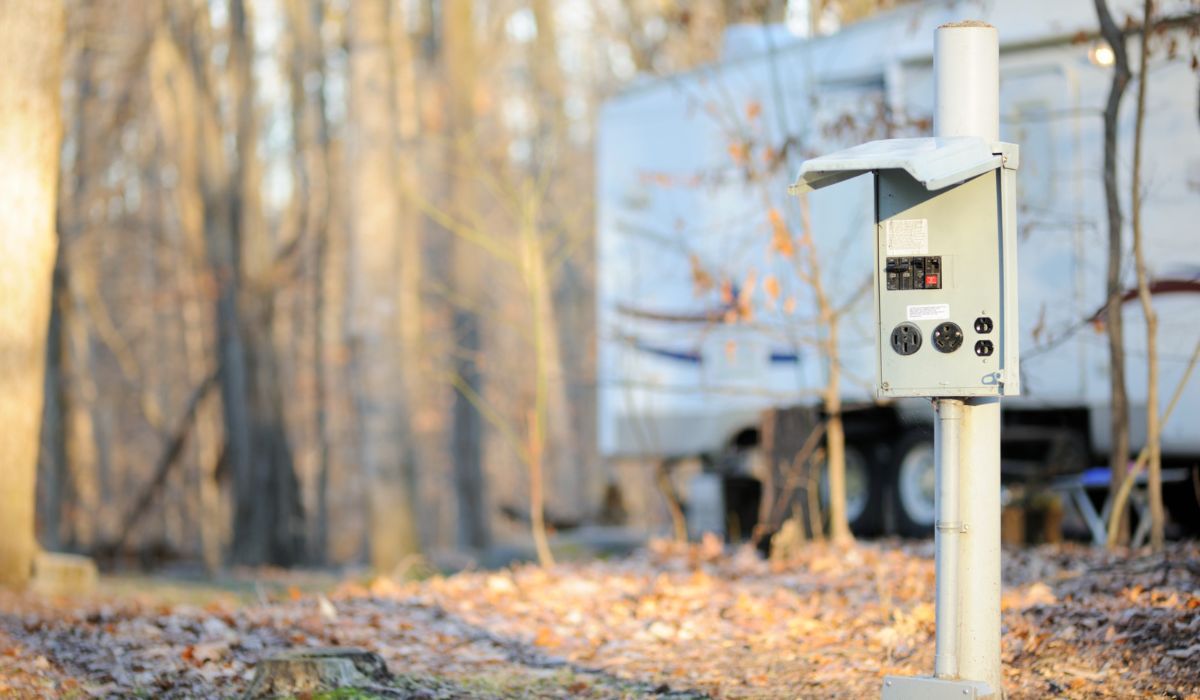
How to connect your RV to electrical power
- Ensure the electrical box you're connecting to is equipped with the correct power level for your RV.
- Turn off the power supply at the electrical box.
Safety tip. Don't connect to power if the electrical outlets or your power cord look damaged.
- Connect an adapter to the electrical box if the campground amperage differs from your RV and surge protector.
- Connect your surge protector to the adapter. If you're not using an adapter, connect the surge protector directly to the outlet on the electrical box.
- Turn on the power at the electrical box to test the power supply.
- Wait for the surge protector's lights to indicate a safe and stable power supply.
- Turn off the power at the electrical box once you verify the safe and stable power supply.
Safety tip. If your power supply is unstable or not working, turn the power off at the pedestal and contact someone at the campground for help.
- Connect one end of your RV's power cord to the surge protector.
- Connect the other end of your RV's power cord to the RV.
- Turn on the power at the electrical box.
RVezy tip. Most RV rentals come with 30- or 50-amp power cords. Generally, smaller RVs use 30-amp, while larger RVs use 50-amp outputs. In addition, campgrounds may sometimes have a 15- or 20-amp power source, which looks like a three-prong, residential-style outlet.
Types of electrical outlets
15 amp
A 15-amp electrical cord has either a two-prong or three-prong connection. Most homes across the United States and Canada have 15-amp electrical outlets to power everything from hair dryers and microwaves to computers and televisions. Keep in mind that some larger appliances like air conditioners, washers, and dryers can't operate on 15 amps when running more than one at a time. You'll need to connect to a stronger power source to use two RV air conditioners or an air conditioner and another small appliance simultaneously.
Safety tip. Even though the outlets used to connect a washer and dryer may look similar to a campground RV electrical outlet, the two are not the same — the voltage is different. Do not attempt to plug your RV into a power outlet designed for your home's large appliances.
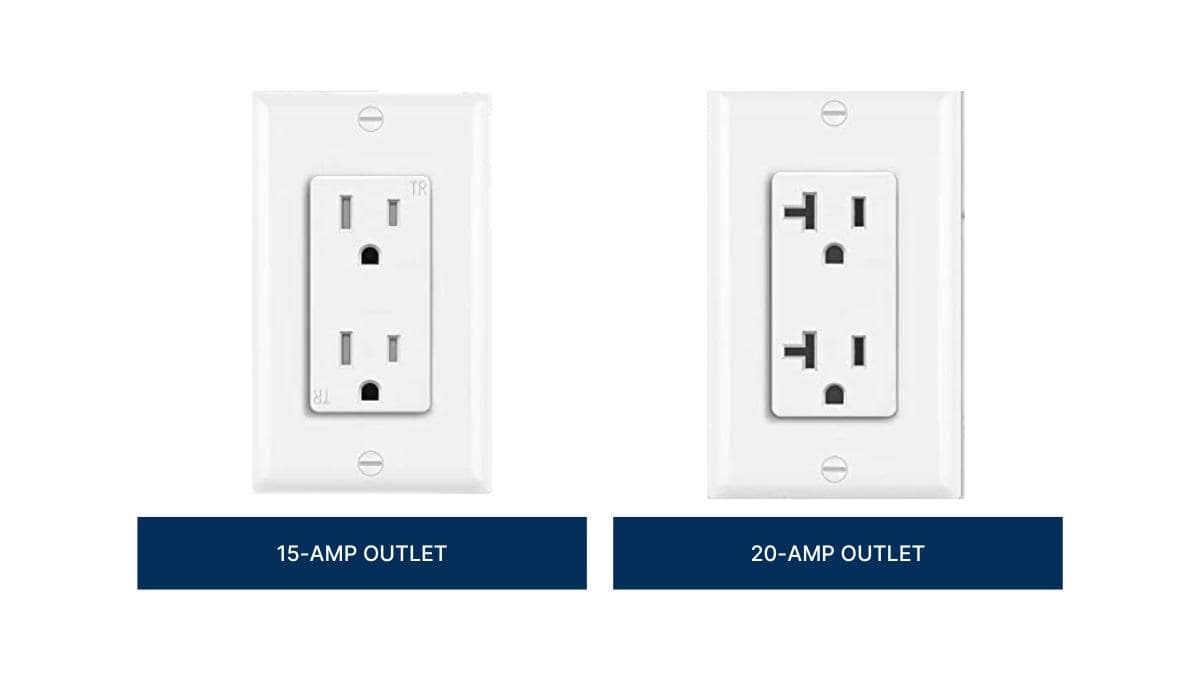
20 amp
A 20-amp outlet looks similar to a 15-amp outlet, except it features a t-shaped slot, which indicates it uses a higher-gauge wire than the 15-amp connection. As a result, 20-amp outlets can handle a heavier load than most 15-amp outlets.
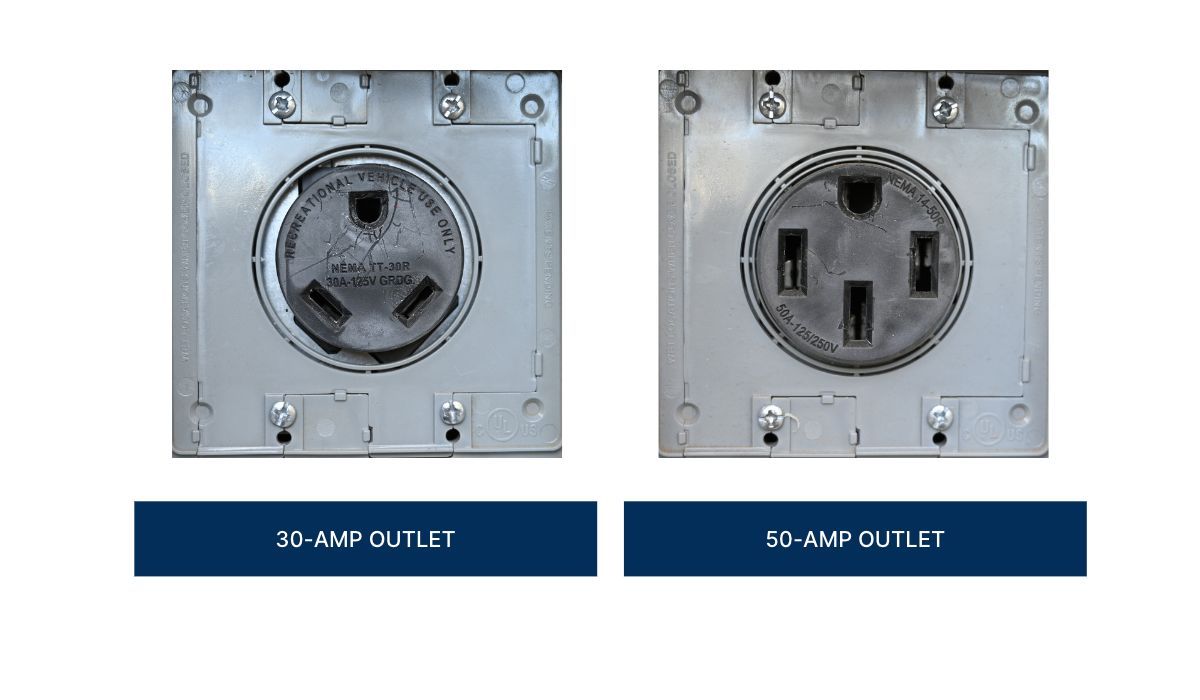
30 amp
A 30-amp electrical cord has three prongs. One end of the 30-amp cord connects to the campground's power pedestal, and the other connects to the RV's electrical inlet.
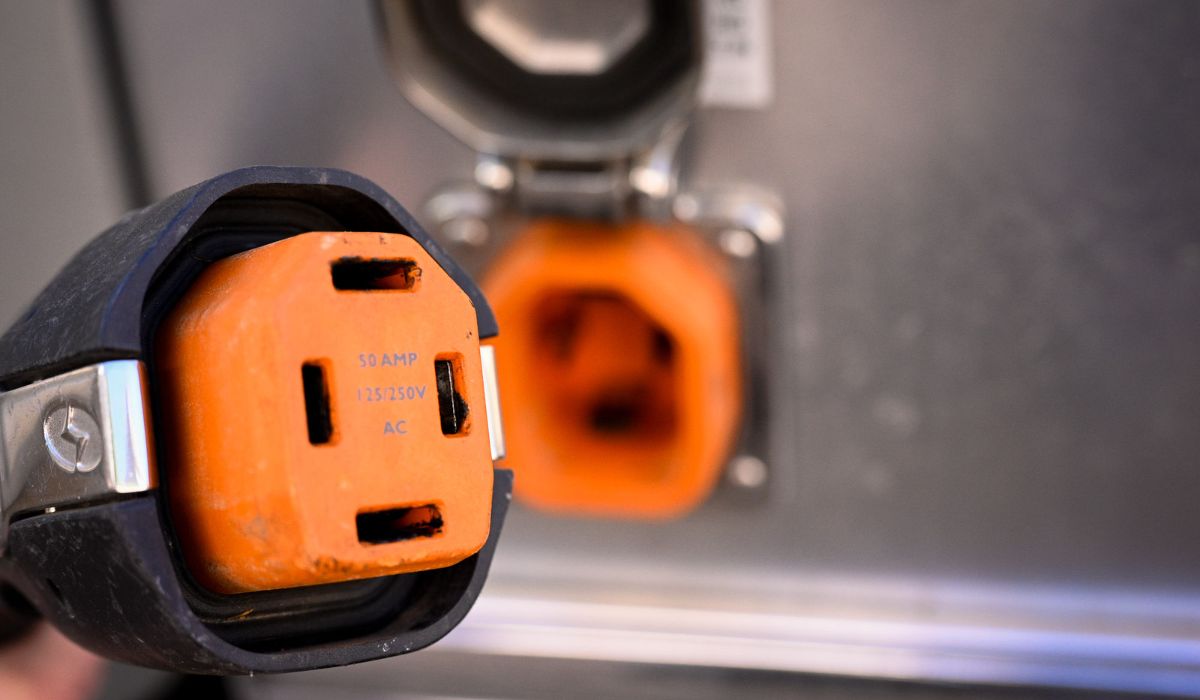
50 amp
A 50-amp electrical cord has four prongs. One end of the 50-amp cord connects to the campground's power pedestal, and the other connects to the RV's electrical inlet.
RVezy tip. Circuit breakers trip to prevent overheating and damage. You'll trip the campground's circuit breaker if you attempt to power more than the electrical source can handle. If you trip the circuit, go outside to the pedestal to reset it, and then refrain from operating more than one thing at a time.
Adapters and extension cords
If you need to connect to a power source that's different from the one on your RV, you'll need an adapter. RV adapters come in different amperage combinations and shapes. Depending on your power cord and the power source, you may need to carry more than one adapter to connect your cord securely in every situation.
Most RV power cords are long enough on their own if you park close to the campground's electrical source. However, in some situations, reaching the utilities from your campsite is impossible. RV extension cords come in different lengths and amperages and can make plugging your RV into an electrical source easy when you're too far from the electrical outlet.
Surge protectors
Power surges, low or high voltages, and faulty wiring can all damage your RV. A portable surge protector plugs directly into the electrical pedestal and acts as a buffer between the campground's electrical service and the RV. This device can save you thousands of dollars in electrical repairs should something go awry at the campground.
Want to know more about the supplies you'll need at the campground? Check out RV Must-Haves for a Successful RV Trip.
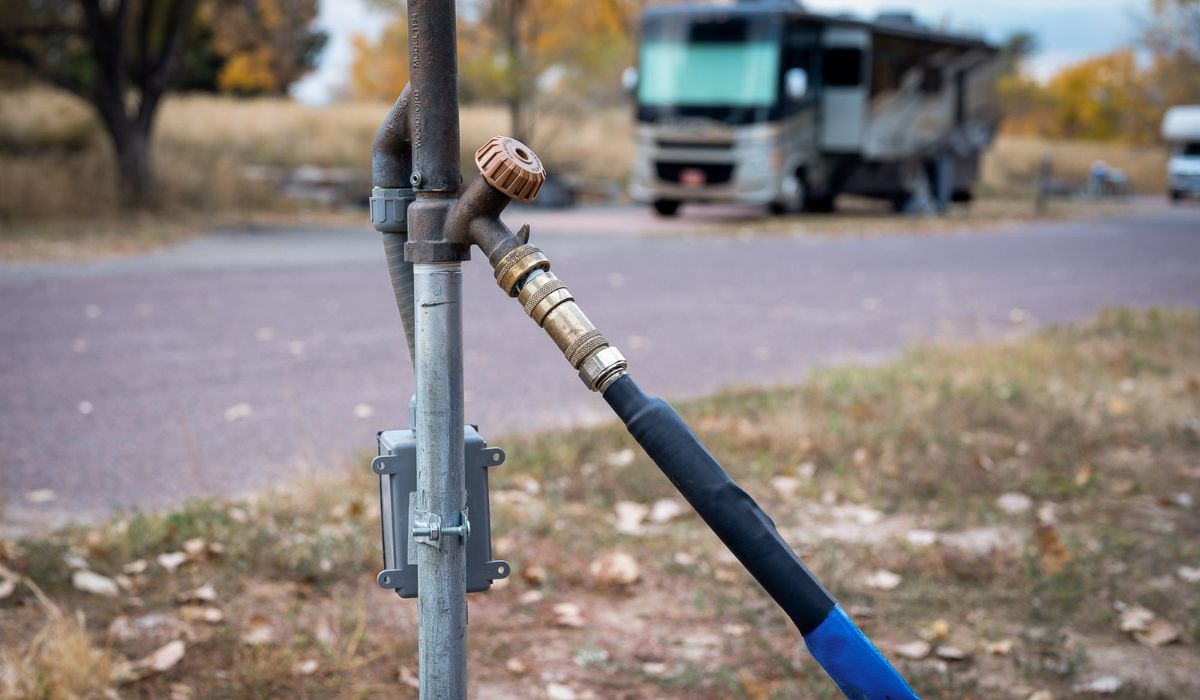
How to connect your RV to water
- Ensure the water connection works before hooking up the water.
- Run the water for at least ten seconds to flush out any sediment or debris in the pipes.
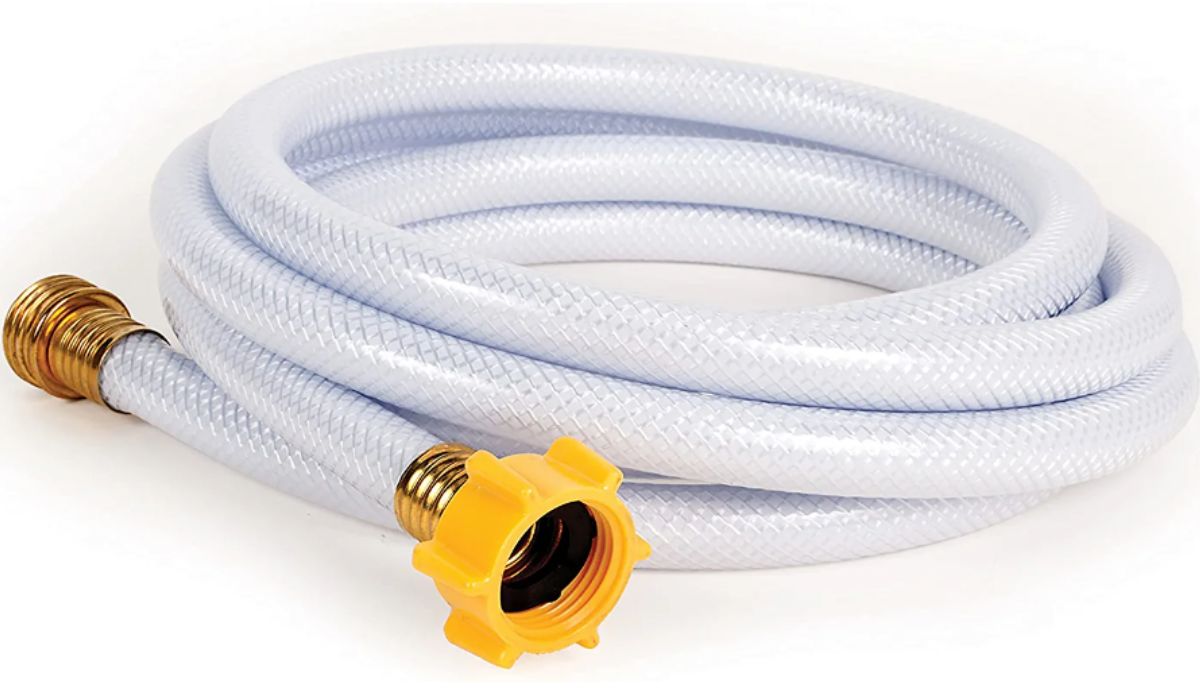
- Connect one end of the RV hose to the campground's city water.
- Rerun the water through the hose for another ten seconds.
- Connect the free end of the hose directly to the RV's city water inlet.
- Turn on the campground's water supply and turn on the faucets inside the RV to flush out the air in the pipes.
- Turn off the faucets once the water runs without sputtering.
- Use the water like you would at home.
RVezy tip. Keep your RV pump off any time you're connected to city water.
Optional water pressure regulator
Water pressure regulators reduce the pressure from the city water and protect the plumbing inside the RV. Although water pressure regulators are optional, many RV parks will recommend them, especially if the water pressure is high.
- Connect an inline water pressure regulator to the water source.
- Connect one end of the RV hose to the water pressure regulator.
Optional inline water filter
Inline water filters are optional and help remove impurities from your water source. It's best practice to attach the filter close to the RV to purify the water before entering the plumbing system.
- Attach the water filter after connecting the hose to the city water.
- Connect one end of the water filter to the hose and rerun the water through the hose for another ten seconds.
- Attach the other end of the inline water filter to the RV's city water inlet.
Types of water hookups
Dedicated water (most common)
If you have a dedicated water connection, you'll have your own water faucet at your campsite. This connection is similar to what you'd use at home with a garden hose, except you'll use an RV hose instead of a green hose. Most RV hoses are white or blue to help differentiate drinkable water hoses from black water hoses.
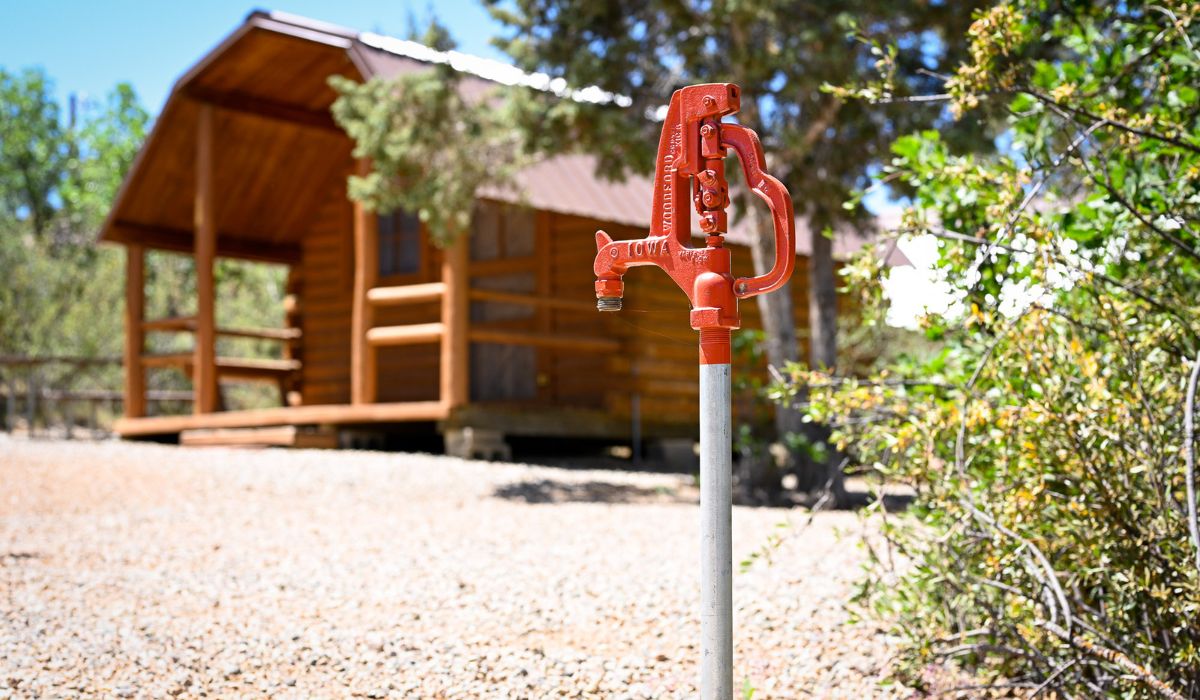
Central water
Central water faucets are often located next to the comfort station or another camper services building. This water source is intended for drinking and dishwashing, not filling your freshwater tank.
You may have to share water with a neighboring site in some campgrounds. When a campsite has a shared water hookup, it will have either one water source split into two faucets or one faucet that you can use to hook up a hose and refill your tank when you need water. Occasionally, the campsite's description will indicate that the water source is shared, and you'll need to bring a hose splitter if you want to stay connected to water during your stay.
RVezy tip. Campgrounds often winterize their water supplies when the temperatures are near freezing. The winterization process is different at every campground, meaning they've insulated the water supply or turned off the water for the season.
How to connect your RV to the sewer
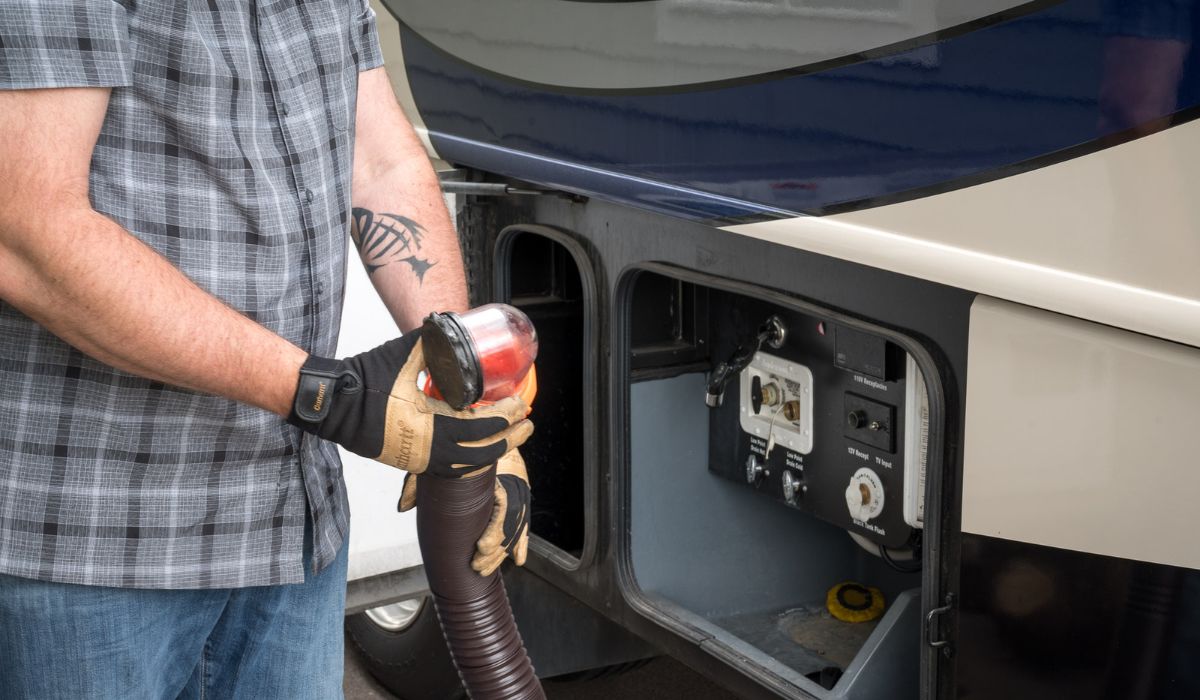
- Ensure your hose can reach from the RV to the sewer pipe without being completely stretched out.
- Put on your disposable gloves.
- Make sure the holding tank valves are closed.
- Remove the sewer hose storage caps from both ends of the sewer hose.
RVezy tip. The holding tank valves release liquid stored in the tanks. The end cap covering the holding tank outlet should not be used as a substitute for a closed holding tank valve.
- Remove the end cap covering the holding tank outlet.
- Attach the bayonet end of the sewer hose fitting onto the holding tank outlet.
- Attach the outlet end of the sewer hose to the dump station’s sewer pipe. If you have a translucent elbow or a sewer pipe adapter, attach those items before connecting the outlet end of the sewer hose to the dump station’s sewer pipe.
- Double-check that the sewer hose connection is secure and will remain in place while releasing liquid.
RVezy tip. Local laws may require a campground to enforce the use of a sewer hose support any time you want to keep your hose connected to your RV when you're not actively dumping. A sewer hose support keeps your sewer hose off the ground and helps release the waste more efficiently.
How to connect your RV to cable
If your campground has cable television, you'll likely get more TV channels than you would if you were to rely solely on your RV's antenna.
- Ensure your coaxial cord can reach from the campground's cable outlet to the cable RV inlet on your RV. We recommend that you have a cable at least ten feet long.
- Connect one end of the coaxial cable to the campground's cable outlet.
- Connect the other end of the coaxial cable to the cable TV inlet.
- Turn off the antenna booster inside your RV if you have one.
- Scan for available channels.
RVezy tip. Make sure you turn your antenna booster off when you want to watch cable TV. The antenna booster helps strengthen over-the-air television signals and, when left on, weakens your cable reception.
Related reads
Everything You Need to Know About Emptying Your Tanks
How to Find a Dump Station Near You
How to Reserve an RV Campsite

Meagan Butler
Meagan is a glitter-loving, trailer-towing RV content writer. When she's not camping in her Winnebago Solis, she spoils her dogs, takes landscape photography, and supports the RV community.
View more posts